
Intro: Why GEKO?
Maybe I should answer what is GEKO first… G = Gitlab, E = Elasticsearch, K =Kibana O = OpenCTI
What if your Gitlab repositories could do more than just host your detection rules.
What if it could validate, manage, update, revert, query and even more . Welcome to Detection as Code (DaC) – where Gitlab, Elasticsearch, and Kibana team up to not only host your detections, but change the way your rules are managed.
Why this Stack?
🦊 Gitlab : Your CI/CD powerhouse, now doubling as a security data source.
🔍 Elasticsearch: High-speed search engine for indexing logs and running detection rules.
📊 Kibana: The fancy front-end to help you visualise your data.
🛡 Detection as Code: Automate security analysis using Sigma and Elastic Rules.
With docker, we’ll containerise everything, making it portable, scalable, and easy to deploy.
Prerequisites: Minimum requirement
This will depend on your environment, but below is what I’ll be using to demo the set up;
Hardware Requirement:
🖥 CPU: 4 cores minimum
📀 Disk: 50GB+ SSD (especially if you store large repos)
💾 RAM: 8GB+ (16GB recommended for production)
Software Dependencies:
🐧(Ubuntu 20.04+) – I’ll be using v24.10
🐳Docker – apt install docker.io
⚙️Docker-compose – curl -L https://github.com/docker/compose/releases/download/v2.18.0/docker-compose-linux-x86_64 -o /usr/local/bin/docker-compose
Run docker-compose --version to ensure you have the latest version. I’ll be using V2.18.0
Deploy GitLab with a docker-compose.yml
I’ll be using a working directory of /opt/docker/; create a file with your choice of text editors, I’ll be using nano (yes nano, Oh My) named docker-compose.yml. This will act as the config file, and we’ll point docker to it when complete. Add the following text;
services:
  elasticsearch:
    image: docker.elastic.co/elasticsearch/elasticsearch:8.17.0
    container_name: es
    environment:
      - discovery.type=single-node
      - bootstrap.memory_lock=true
      - "ES_JAVA_OPTS=-Xms1g -Xmx1g"
      - xpack.security.enabled=true
      - ELASTIC_PASSWORD=Changeme
    ulimits:
      memlock:
        soft: -1
        hard: -1
    volumes:
      - esdata:/usr/share/elasticsearch/data
    ports:
      - "9200:9200"
    networks:
      - elastic

  kibana:
    image: docker.elastic.co/kibana/kibana:8.17.0
    container_name: kib
    volumes:
      - /home/lab/kibana.yml:/usr/share/kibana/config/kibana.yml
    environment:
      - ELASTICSEARCH_HOSTS=http://elasticsearch:9200
      - ELASTICSEARCH_SERVICEACCOUNTTOKEN=<run the following in elastic to get key> # sudo docker exec -it es ./bin/elasticsearch-service-tokens create elastic/kibana kibana (Run this in ES to generate a token)
      - xpack.encryptedSavedObjects.encryptionKey=abcdeabcdeabcdeabcdeabcdeabcdeab
    ports:
      - "5601:5601"
    depends_on:
      - elasticsearch
    networks:
      - elastic

  gitlab:
    image: gitlab/gitlab-ce:latest
    container_name: gitlab
    hostname: gitlab.local
    environment:
      GITLAB_OMNIBUS_CONFIG: |
        external_url 'http://gitlab.local'
        gitlab_rails['gitlab_shell_ssh_port'] = 2224
    ports:
      - "80:80"
      - "443:443"
      - "2224:22"
    volumes:
      - gitlab_config:/etc/gitlab
      - gitlab_logs:/var/log/gitlab
      - gitlab_data:/var/opt/gitlab
    networks:
      - elastic

  gitlab-runner:
    image: gitlab/gitlab-runner:latest
    container_name: gitlab-runner
    volumes:
      - './runner_config:/etc/gitlab-runner'
      - '/var/run/docker.sock:/var/run/docker.sock'
    networks:
      - elastic
    restart: always

volumes:
  esdata:
    driver: local
  gitlab_config:
    driver: local
  gitlab_logs:
    driver: local
  gitlab_data:
    driver: local

networks:
  elastic:
    driver: bridge
This is the final docker-compose.yml (Oh My!), but we only want GitLab running for now, so run docker-compose -d up gitlab.
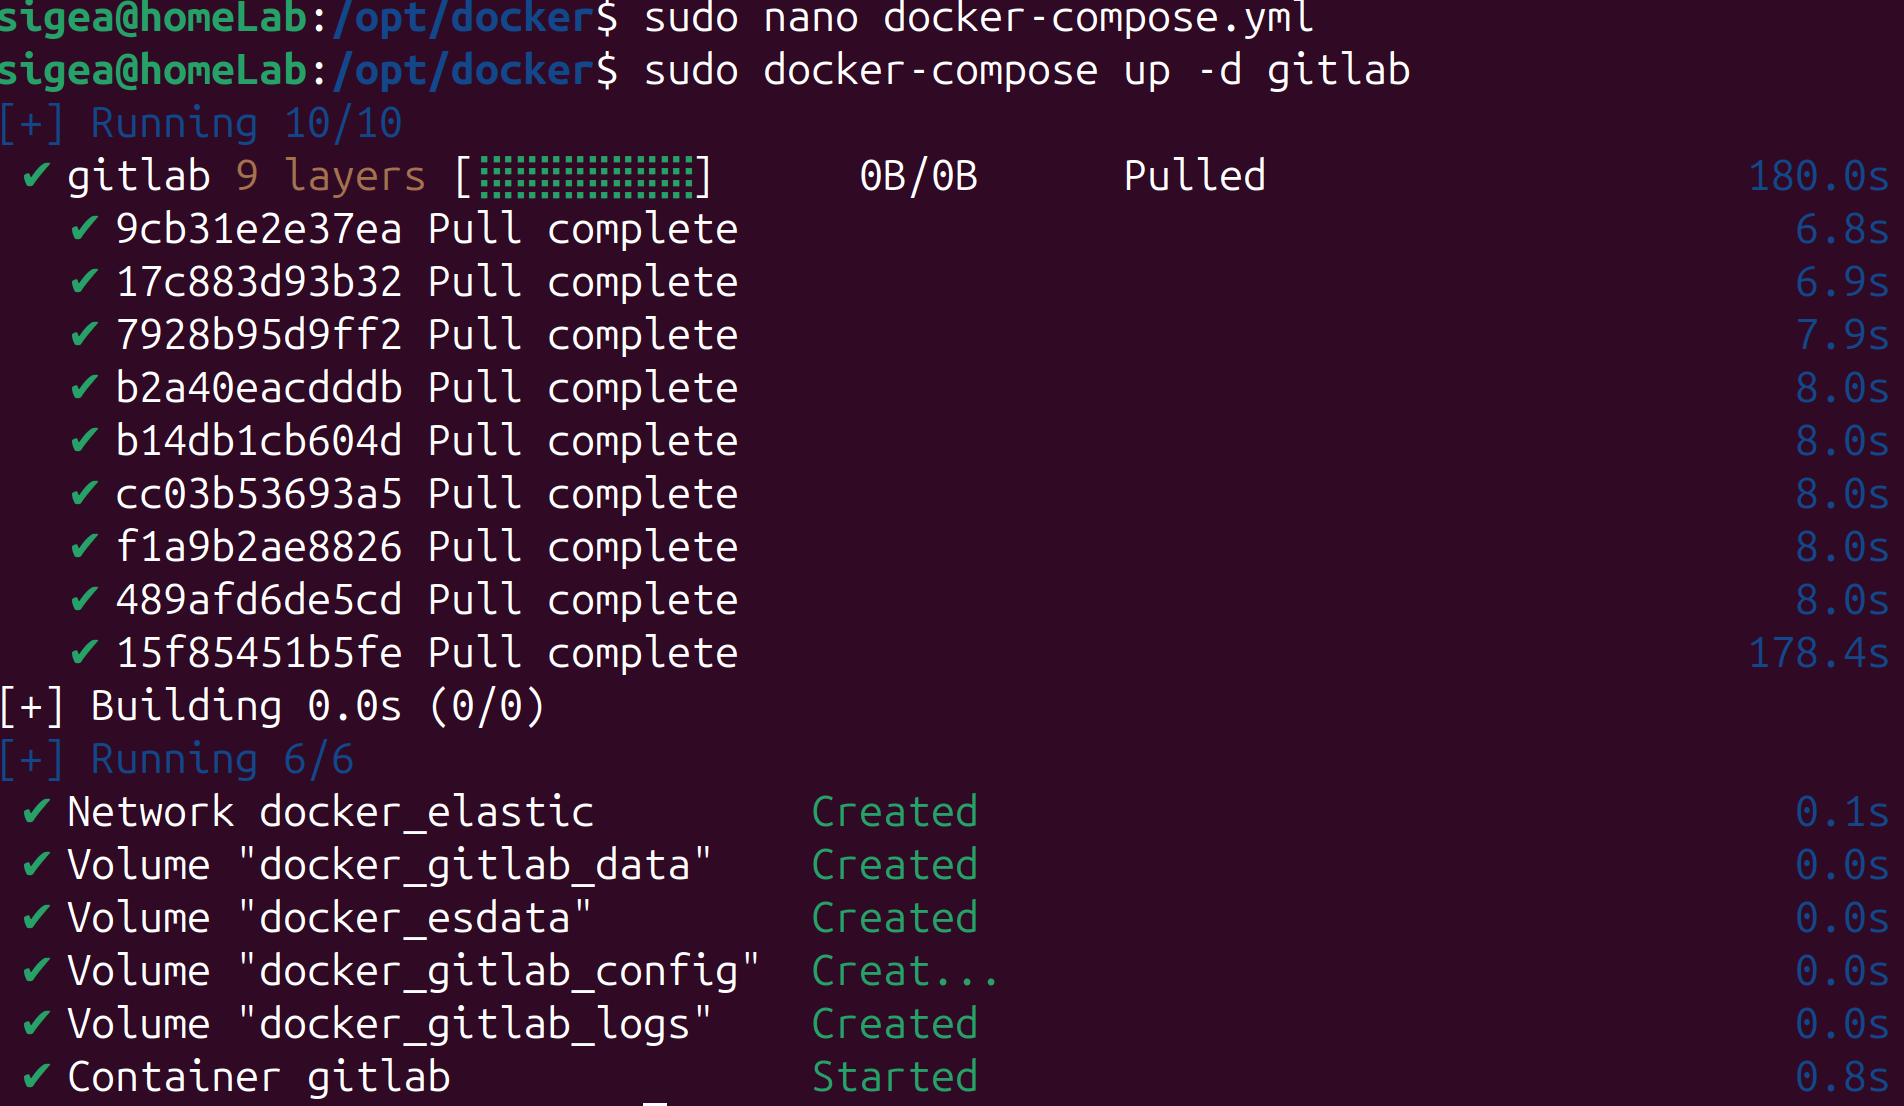
☕Grab a coffee, this will take a while. If you’re impatient and like watching logs, and who doesn’t, run docker logs -f gitlab this will show a stream of the gitlab logs as it sets up, once its finished, you’ll be able to browser to it.

Remember the password we set earlier 👀 me either. For those that did follow the logs you probably caught sight of the word password, for those that didn’t just run the following (optional) docker logs gitlab |grep initial_root_password. This will show that the initial password is in /etc/gitlab/initial_root_password.

To get the password we just need to read that file, but it’s store in the Gitlab image, to run commands in the docker image we can use docker exec -it <image> <command> so for us it will be docker exec -it gitlab cat /etc/gitlab/initial_root_password. We’ll be using docker exec -it later to register the runner.

#Note: As the file states this password file will be deleted in 24 hours, so grab it and log in ASAP.
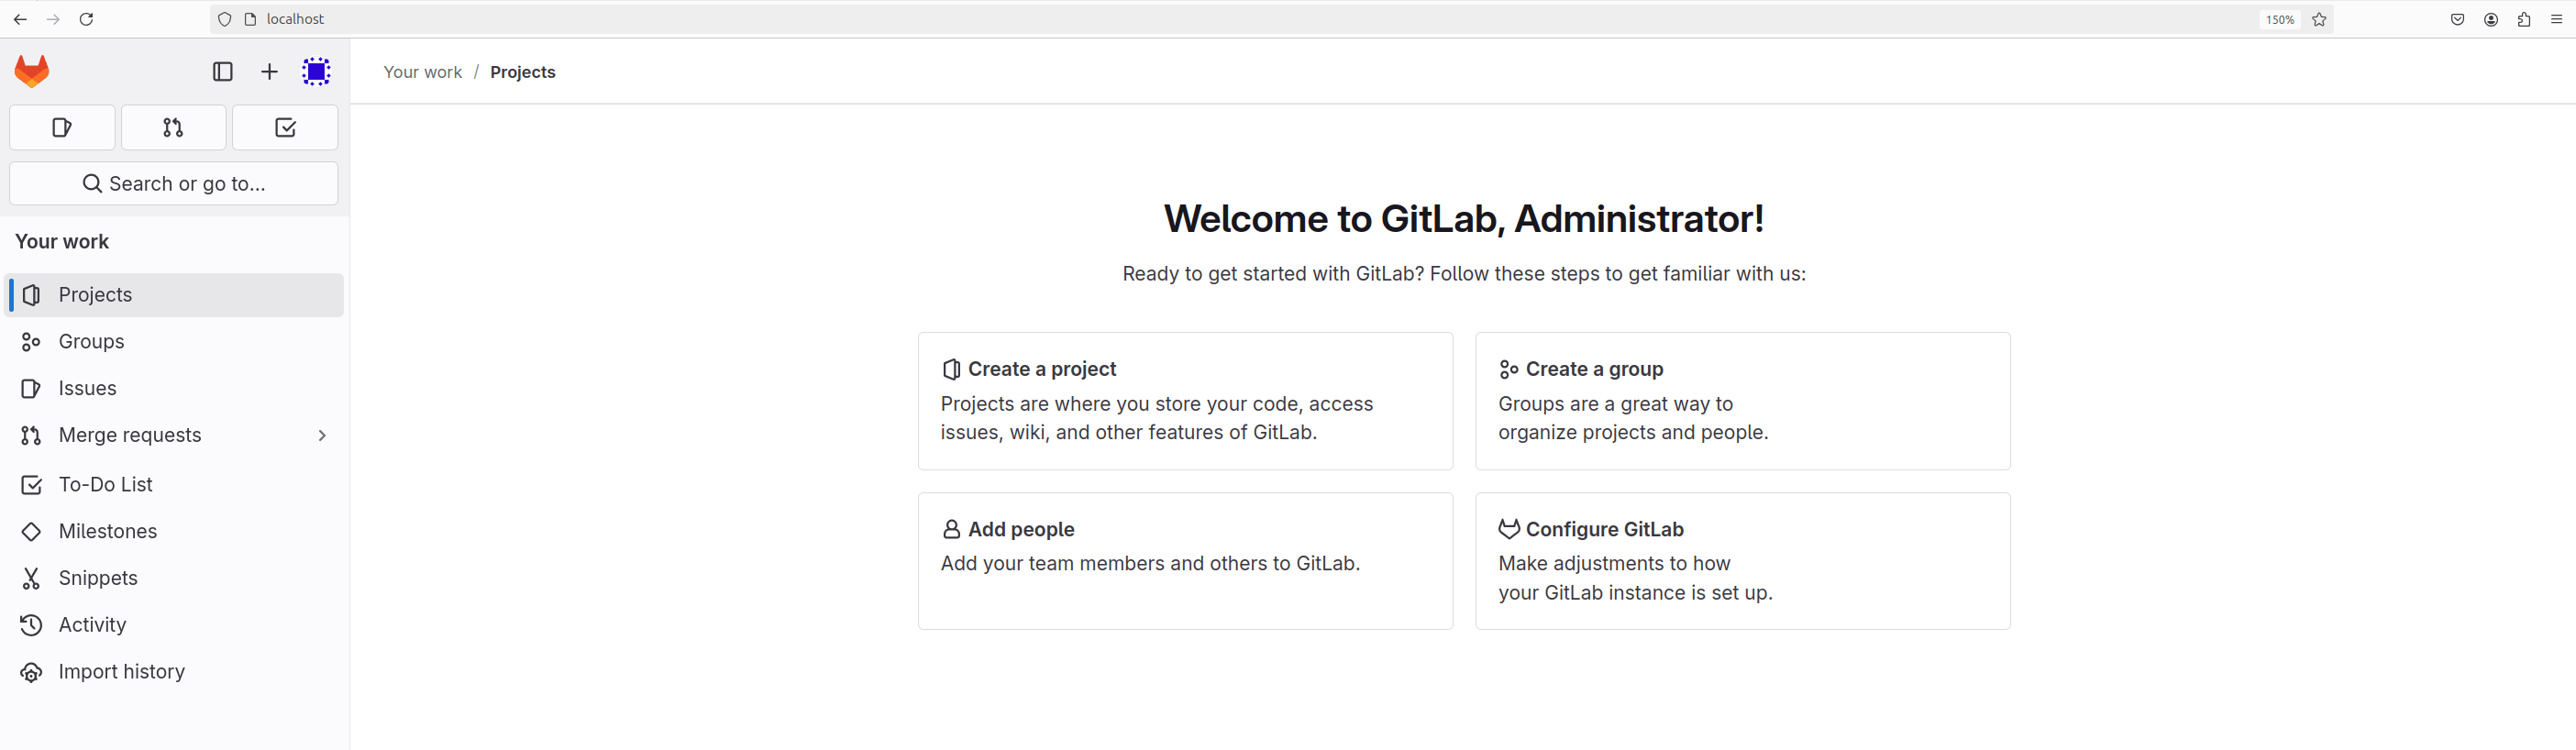
We’re in, OH MY!
Conclusion
That’s it, you now have a working version of GitLab. Have a look around and see what’s available, change your initial password for a start. I’ve added the full docker-compose.yml, if you’re feeling brave 🦁 enough to go it alone. Few pointers if you do.
1. Update ELASTIC_PASSWORD=Changeme in the elasticsearch section of docker-compose.yml, then run docker-compose up -d elasticsearch to start Elasticsearch.
2. Once running, run docker exec -it es ./bin/elasticsearch-service-tokens create elastic/kibana kibana this will generate a service token to allow Kibana to communicate with Elasticsearch. It can no longer use the default ‘elastic’ user.
3. Add the generated password to ELASTICSEARCH_SERVICEACCOUNTTOKEN= in the Kibana section of docker-compose.yml and run docker-compose up -d kibana.
🪜NEXT STEPS
Setting up a Gitlab runner 🏃♂️
Some useful docker 🐳 commands
Set up Elasticsearch and Kibana, without them we’re just GO!